Showing posts with label Crafts. Show all posts

Thursday, March 27, 2014

DIY Ruler Growth Chart

It seems like these are all the rage! They are all over the blogosphere and honestly, I can see why. THEY ARE SO EASY! No really. E.A.S.Y. And they can be done over time without a lot of supplies, so you don't have to worry about your project junking up the dining room or garage or wherever you get your craft on.

Supplies
  • 6'x6"x1" Board. You can find these at ANY home improvement store. Look for one with some fun knots. I got mine at Lowes for under $7.
  • Small Can O' Stain. The stain manufacturers want you to think that stain is like paint. It's not. Go small. You'll seriously thank yourself later for not dropping a nice chunk of change on a big can you'll never finish. I used Early American 230 by Minwax 8oz.
  • Brush and Cloth for Staining. I used a foam brush to apply the stain and then wiped excess with an old kitchen towel.
  • Pencil.
  • Scissors.
  • Black Sharpie Marker.
  • This FANTASTIC Template. (This is a Microsoft Publisher file. Every time I tried to convert it to pdf or xps, my page would shrink and not maintain the correct measurements. Since it is a tracing template, I assumed you'd want the template to be correct.)
Instructions
  1. Stain your board. If you've never stained anything before, this is a great time to learn and make mistakes. Stain is pretty user friendly as long as you aren't in direct sunlight (the sun will warm your wood and make your stain a bit tricky to work with). Simply paint on and then wipe off the excess. I let my stain rest about 5 minutes before wiping. You might want to start with the sides or the ends to see if you like the color stain that you chose. Some woods suck up stain faster than others, so just make sure you are getting the color you want. If you aren't happy, try applying a wood conditioner first that will enable the wood to absorb a more accurate color. I probably applied 3 coats. And because I have 2 littles, I didn't wait between coats. If it felt dry, that was good enough for me. If you're planning to stain furniture, be a bit more picky! Out of my 8oz can, I probably have about 4oz left.
  2. Print out the DIY Ruler Growth Chart Template. The font for the numbers is Century 200pt (almost 2" tall). As for the notches, I used 4 different lengths and made them as chunky as the numbers so they would appear proportionate.
  3. Start with notches. Cut along the dotted yellow line. You'll need to decide where you want to start numbering. I started 6" up from the end of the board as my 1' mark. This will allow me to hang the board on the wall above the baseboards. It also allows me a few more inches above the 6' mark at the top (though I doubt any of our kids will come close to six feet tall). When you decide where you want your 1' mark, grab the notches print out! Turn it over on the back and scribble (with pencil) across each of the notches. Now turn the paper right side over and line up your desired 1' mark with the FOOT notch. The dotted yellow line should be flush with the edge of the board. Hold your paper steady and simply trace around each of the notches. This will transfer the scribbled pencil on to your board so that you can go back later and color them in with your Sharpie. You'll need to keep an eye out for HALF FOOT and FOOT notches, but the 5 shorter lines in between repeat just fine no matter what order. I found it easiest to simply mark all the HALF FOOT and FOOT marks first, then go back and fill in the 5 middle notches.
  4. Now onto the numbers! Each number has a solid line running through it. These solid lines divide up your number so that it aligns properly with the numbers above and below it on your board. For my board, I centered my numbers 3/4" away from the foot notches. I've marked those in red dotted lines. You could space them further at 1" away, noted in blue dotted lines. Turn your numbers over and scribble away. Turn the paper right side over, align end of foot marks with either red or blue dotted lines and the horizontal solid line, and trace.
  5. Finally, the most exciting part! Color in all of your traced lines with a nice Sharpie!
TADA! See, I told you it was easy!

Friday, May 17, 2013

DIY Super Hero Fort Kit

Found out just a few days ago that my nephew's 4th birthday party is tomorrow. With such short notice, I scrambled to find the perfect gift. He is having a Super Hero party, so I searched along those lines.

Check out this amazing blog post from Meg & Andy on how to create your very own DELUXE Super Hero Fort Kit. So thankful for her inspiration and quick thinking. For the canopy, I purchased a twin flat sheet from Walmart and some matching ribbon. I cut the ribbon into 18" pieces, folded in half and sewed the folded ends 1.5" zig zag on the underside of the sheet on each of the four corners and then in the middle of each side. When using ribbon, it's important to remember to melt the edges to prevent fraying. I use my aim 'n' flame candle lighter. If you get the flame too close, you'll burn the ribbon, so stay about 1/4" away. To make the drawstring bag, I bought 1/3 yard of 42" wide fabric from Hobby Lobby, folded it in half and trimmed 4" off from the selvage edges. Then I followed this fabulous tutorial at Purl Bee (just love all of her pictures). The project took about an hour, including the ironing (majority of the time) for the flat sheet.

Monday, March 4, 2013

Pinwheel Party

This party was by far the most fun and colorful event I've ever planned! Sophia has a lot of interests at her young age, but no such love for character themes; hence, the pinwheel theme. Pinterest and Google Images were a great source of help! I have always loved pink and yellow, and somehow teal fell right in line with her early spring celebration. Below are links to specific tutorials or ideas that I used to make this party a success.


Stationary and Decorations
  • Pinwheel Invitations
    • Inspiration
    • Invite (Microsoft Publisher file includes postcard option and 4x6) printed on white paper with black and pink ink and attached (spray adhesive) to yellow cardstock (cut 4"x6")
    • Paper pinwheels (double-sided paper) with yellow centers (cut-out cardstock) and sticks (double-sided paper scraps) attached (rubber cement) to white paper
  • Folded Paper Pinwheels Wall Installation
    • Inspiration
    • Used scoring board
      • 1/2" folds were accomplished by marking every whole inch [i.e., mark 1", 2", 3", etc. lines] on the front of the paper and marking every half inch [i.e., 0.5", 1.5", 2.5", etc. lines] on the back side
      • 1" folds were accomplished by marking even whole inches [i.e., mark 2", 4", 6", etc. lines] on the front of the paper and marking odd whole inches [i.e., 1", 3", 5", etc. lines] on the back side
    • 13" Diameter (1) - four pieces of 3"x12" folded every 1/2" 
    • 12" Diameter (3) - four pieces of 3"x12" folded every 1"
    • 11.5" Diameter (4) - four pieces of 4.25"x11" folded every 1/2"
    • 9" Diameter (4) - 3 pieces of 4"x12" folded every 1/2"
    • 7.5" Diameter (1) - 4 pieces of 3"x9" folded every 1"
    • 7.5" Diameter (1) - 2 pieces of 4.25"x11" folded every 1/4"
    • 6.5" Diameter (2) - 2 pieces of 4.25"x11" folded every 1/2"
    • 6.5" Diameter (1) - 4 pieces of 3"x12" folded every 1"
    • 6" Diameter (1) - 3 pieces of 4"x12" folded every 1/2"
    • 5" Diameter (1) - 2 pieces of 3"x12" folded every 1/2
Attached to wall w/masking tape.
  • Hanging Tissue Paper Fans (similar item)
    • 16" Diameter (2)
    • 12" Diameter (2)
    • 8" Diameter (1)
    • Should have hung fans lower for better photos.
    • 5" Diameter (1)
  • Pennant Banner on Highchair
    • Inspiration
    • Single-sided fabric cut into 5"high x3"wide triangles
    • Attached to teal ribbon with hot glue (to help provide extra grip to highchair)
    • Ribbon attached to highchair with painter's tape to take care of finish --- very temporary hold!
  • Paper Straws (similar item)
    • Lime green and white stripes
    • 2" paper pinwheels (single-sided paper) with dots (cut-out cardstock) hot glued to straws
Favors
Piping icing took FOREVER!
Food
It was delicious!
  • Yellow Banana Cake (four 8" round & one 6" round) with Buttercream Frosting. I really wish I had gotten some photos of this. I made the cakes the day before and iced the day of. Would have been better to bake AND ice the day before because it took quite a long time the morning of the party! To ensure a beautiful cake, butter and flour your pans! The easiest method is to take one tablespoon of butter and push it all around the sides and bottom of the pan with a piece of wax paper. Then add one tablespoon of flour and shake the pan until it's covered, dumping excess into next pan. The box mix says to use an ungreased pan, but I think they must be crazy! To ensure a worry free icing experience, be generous! Ice the "crumb coat" at least an hour before applying the rest of your icing. The crumb coat is a layer of icing that goes all around the cake and on top so that when you apply the rest, your cake doesn't crumb off. YouTube has some great tutorials on this.
  • Cut Fruit with Dip
  • Spiral Wraps
  • Cranberry Meatballs
  • Vegetable Tray
  • Hummus (from local shop)
  • Pink Lemonade with Sprite

Sophia's Pink Dress
This might have been the most enjoyable task. I used McCalls Pattern 6015 to create the dress I couldn't find in stores. I wanted a very traditional, long dress with just enough poof. ---Ok, I'll admit, I added extra poof! The pattern wasn't the easiest to figure out, but thankfully YouTube is chockfull of video tutorials! I even managed to fully line the zipper. I used pink broadcloth from Hobby Lobby and added gathered tulle from my 6" wide rolls that I typically use for tu-tu's. The final touch was the addition of two felt pinwheels (made from typical craft felt)! They are simply pinned on so that I can add a different pop of color just in case we need to match for another occasion, Easter perhaps.

Tuesday, January 29, 2013

Update on the Piano Wall

Got a nice jumpstart on the piano wall and mantel. I was able to fix my sagging coffee filter wreath with some handy zip ties and a grape vine wreath from the local dollar store. I think I might lower the wreath just a bit so it's centered up in the window. I also would like to make some heart garland! We'll see if that gets done amidst the whirlwind in the dining room for Sophia's big day.

I found the printable to the right on pinterest! I also had fun making the paper hearts in the wanna-be-cloche (glass from a non-existent brass anniversary clock and a small pottery plate). Thank goodness for freebies!

Thursday, January 24, 2013

Fleece Hats & Gloves - Animal Style

Christmas in Ohio meant that the cousins would always get similar items. I enjoyed this! Last year, I sewed matching Spiderman sleep pants for my three nephews. This year, I knew I would need to take it up a notch to include their baby sister and my youngest niece! I found a great site with hundreds of fleece tutorials. Although their directions are somewhat lacking, the patterns are easy enough to figure out.

I used these patterns (child hat, baby hat, mittens) and ideas from Martha (Stewart, obviously) to whip up some fun gifts. No, these aren't fast projects or even that inexpensive, but the holidays are a time to invest in the lives of others!

I tweaked some of the patterns to fit the concepts. Specifically, the fleece and my sewing machine did not fair well when it came to button-holing, so instead I stitched a button hole by hand, cut the fabric inside the button hole to create a place for clip-on bows. Then I used some leftover ribbon to give Lily a bit of class. For the boys, I used the same size hat (child small) for all three (ages 3 to 7). For the mittens, I used one child large and two child mediums. The infant mittens were based on some mittens I was given for Sophia. They didn't fit as nicely as the patterned ones.

Supplies:
  • Multiple colors of fleece cut to 1/4 yard
  • Craft felt
  • Hot glue
  • Craft glue
  • Thread
  • A small amount of polyfil for the Viking horns (none used in the dinosaur hat)
Assembly:
  1. Cut fabric on the bias so that your hats stretch! You'll regret it if you don't.
  2. Stitch seams/elastic to mitten pieces BEFORE you attach front and back of mittens. The hats do not use elastic, but are simply stitched with a large zig zag.
  3. Stitch any "extras" (i.e., dino spikes, shark fin, Viking horns) facing inward between your two fleece pieces. This will ensure they are on the outside when you flip your hat right side out. This is also true for the teeth on the mittens.

Advent Calendar Complete

Has anyone realized it's almost the end of January? Where has this month gone? We've been busy cleaning up from the holidays and getting crafty for Sophia's upcoming FIRST birthday! More to come on those fun projects!

As for the calendar, I finished it just before Christmas. It was so much fun to create the ornaments (some from patterns, others from general ideas I spotted on Pinterest). I used basic craft felt because it was in ready supply and the right price. Felted Wool is your best bet when creating things to last forever, but since this was my first attempt, I figured I should take it easy. Craft glue and sewing floss (typically used for cross-stitch) came in handy! I purchased the craft felt numbers from Sunshine Annie on Etsy. She's got a wide variety of colors and fonts to choose from and she shipped my order in record time. (Her card is stuck in the #6 pocket so I don't lose it, but I really should have pulled it out for the glamour shot!)

Coffee Filter Wreath

I've been working on my piano mantel and I'm so excited about the latest addition! I found this easy tutorial for a High Impact, Low Cost, Low Time wreath to hang over my painted window.

Supplies:
  • Hot Glue Gun
  • 200-pack Basic Coffee Filters
  • 36" Foam Pipe Casing 3/4" Wide (at Home Depot near the copper pipes) *UPDATE: Use a bulkier foam casing to ensure the wreath's shape. My foam has stretched and now my wreath resembles a large zero instead of a perfect O. I've also read that you can use standard foam forms, old grapevine wreaths, pool noodles, and even paper plates with the center cut out!
  • Packing/Duct Tape
Assembly:
  1. Cut foam to 36". (The foam from Home Depot will come in 6' sections for about $1.)
  2. Tape ends of foam with packing or duct tape.
  3. Fold filters. I did this rather fast and it worked just fine. I placed them inside one hand and pushed down with my fingers on the other hand to make them pointy in the center for glueing.
  4. Hot glue filters everywhere working your way around the foam. Come back and fill in any empty spots.

Wednesday, December 5, 2012

Pennant Banner Tutorial

Oh, how I love those fabric banners! I pin and re-pin them on Pinterest and dream about the day I'll make one --- what's that? Roshena's shower is this week! Better get on it!

 
There are many great tutorials out there, but as I've said before, I LOVE PICTURES. So, if you're looking for some great snap shots, check out the tutorial I followed by Nicole at Simple Homemade.

Supplies:
  • 1/4 yd of at least 5 fabrics. (You really could get away with even less, but the trick is that you need enough scrap fabric to make triangles that are 7" wide at the base and 9" tall.)
  • Scissors OR Rotary Cutter. (Love my rotary and the self-healing mat it came with. Makes measuring and cutting a breeze.)
  • 1 package Bias Tape Double Fold (3-4yds).
  • Sewing Machine. (I guess you could use hot glue to bind it all, but I probably wouldn't recommend it...despite my love affair with the glue gun.)
  • Coordinating Thread.
  • Pins.
Prepping the Fabric:
  • Fold 1/4 yard in half so that the two selvages are touching each other.
  • Trim up the top and bottom with the rotary to get that crisp edge on your pennants.
  • Place your fold of your fabric on the 3/4" line. Your selvages will hang out somewhere near the 24" line.
  • Place your ruler at the 1" line and cut on the diagonal to the 4.5" line.
  • Cut from the 4.5" line to the 8", 8" to 11.5", 11.5" to 15", 15" to 18.5", 18.5" to 22".
  • After you've made your cuts, you'll have your fold and selvage edges that you can toss into the scrap pile and 5 sets of perfect pennants. Aren't you glad you folded the fabric?! In a pinch, you could use that cut from the fold side to create an 11th pennant.
Assembling the Pennant:
  • Lay out your pieces to find the pattern that makes you smile widest. You can use the single pennants OR make them two sided like Nicole did in her tutorial. (I don't like the way pennants lay after being stitched together UNLESS you stitch them together inside out, then flip and iron them.....But Roshena's shower is just days away, so single layer will work just fine with the right amount of starch!)
  • Pin the pieces to your bias tape.
  • Sew a straight or zig zag stitch. I used a zig zag at width 4 and length 4 on my handy sewing machine. I also lined up the double fold bias tape in the center of my needle. 
Don't forget the accessories...
Framed silhouette made from scrapbook paper and a mini flag for food labeling!

Tuesday, October 9, 2012

Tiny TuTu Tutorial

Had a great time last week assembling the fluffiest tutu EVER for our sweet Miss S! Based on a few other tutorials in the blogosphere, I went with the largest yardage suggested and then did some calculating to make it plum perfect. This tutorial results in a tutu that is approximately 7" long. For children ages 3-10, I found that the average length of Etsy tutu's was 9". (See the end of this post for additional measurements.)


Supplies:
  • 8 yards of 54" wide tulle on a bolt. (I purchased 3 yds of 3 different colors and had some yardage left over for cute flowers for a bow to match. The best price I found on 54" wide is at Hobby Lobby when the tulle goes on sale for 77 cents/yd! The cost would roughly be $6.16 plus tax for basic/not shiny tulle.) OR 72 yards of the 6" wide tulle ribbon. (Hobby Lobby has a decent price on these in the Wedding Section: 40 yards for $2 when half off (total cost roughly $4 plus tax). The ribbon tulle in the Fabric Section is 25 yards for $3 when half off....Apparently, the store is banking on you not looking in the Wedding Section when making a tutu!)
  • 25" of elastic. (Measure the child's waist and add 2" is the typical formula when using standard elastic. I used hair bow elastic because it is wider and I was able to attach more tulle without compromising on the size of the waist. The hair bow elastic did stretch some, so in the future, I would measure the child's waist and subtract 1/2".)
  • Scissors.
  • Fabric measuring board. (If using bolt tulle, it will make the cutting of 6" wide strips go very quickly.)
  • Needle & thread. (To sew elastic waistband closed.)
  • One romantic comedy. (To distract you from the mundane task of making knots. It shouldn't take the entire 2 hours to cut the fabric and assemble, but just in case it does, you have something to laugh about.)
Preparing the Tulle:
  • Fold your 54" wide tulle in half and then in half again so you have 4 pieces roughly 13.5" wide.
  • Cut along the folds.
  • Lay the 4 layers out on the fabric board and cut every 6".
  • Stack your 6" wide by 13.5" long strips into piles by color. (You should have about 192 pieces total.)
  • OR, Unroll your tulle ribbon and make cuts every 13.5".
  • Stack your 6" wide by 13.5" long strips into piles by color. (You should still end up with 192 peices.)
Assembling the Adorable:
  • Measure and cut elastic.
  • Sew elastic together to make waist band.
  • If using hair bow elastic, loop 3 pieces of tulle in each "hole" on the bottom row. Then loop 2 pieces of tulle in the next row up that alternates hole spacing. (In the picture to the right, I've only looped one piece through the first row hole and my finger is sticking through a second row hole. The three loops on the first row will get pretty tight and the same goes for the second.)
  • If using standard elastic, loop until you use up all that lovely tulle...or until you can't fit any more loops. Make sure you pull tight so that it makes the smallest knot possible.
  • Fluff, fluff, fluff.
Things to Remember:
  • If one of your strips is shorter than another, it won't be noticeable in the finished product.
  • You also won't be able to see if the tulle has ripped. Yes, sadly, when you pull the tulle isn't always strong enough. Leave those ripped pieces on there, unless you just can't take it.
  • Use any color pattern you want! Be creative!
  • If you want to make a 9" tutu, follow the same steps as above, but make the following changes: You will need 10 and 2/3 yds of 54" wide tulle OR 96 yds of tulle ribbon. For the bolt tulle, fold into thirds instead of fourths to make 3 layers that you will still cut into 6" wide strips. For the tulle ribbon, cut the ribbon every 18". You will still end up with 192 pieces.
  • Tutu too big? Cut the recipe in half! Here's a photo of Sophia (above right) with only half of the pieces assembled!

Thursday, September 13, 2012

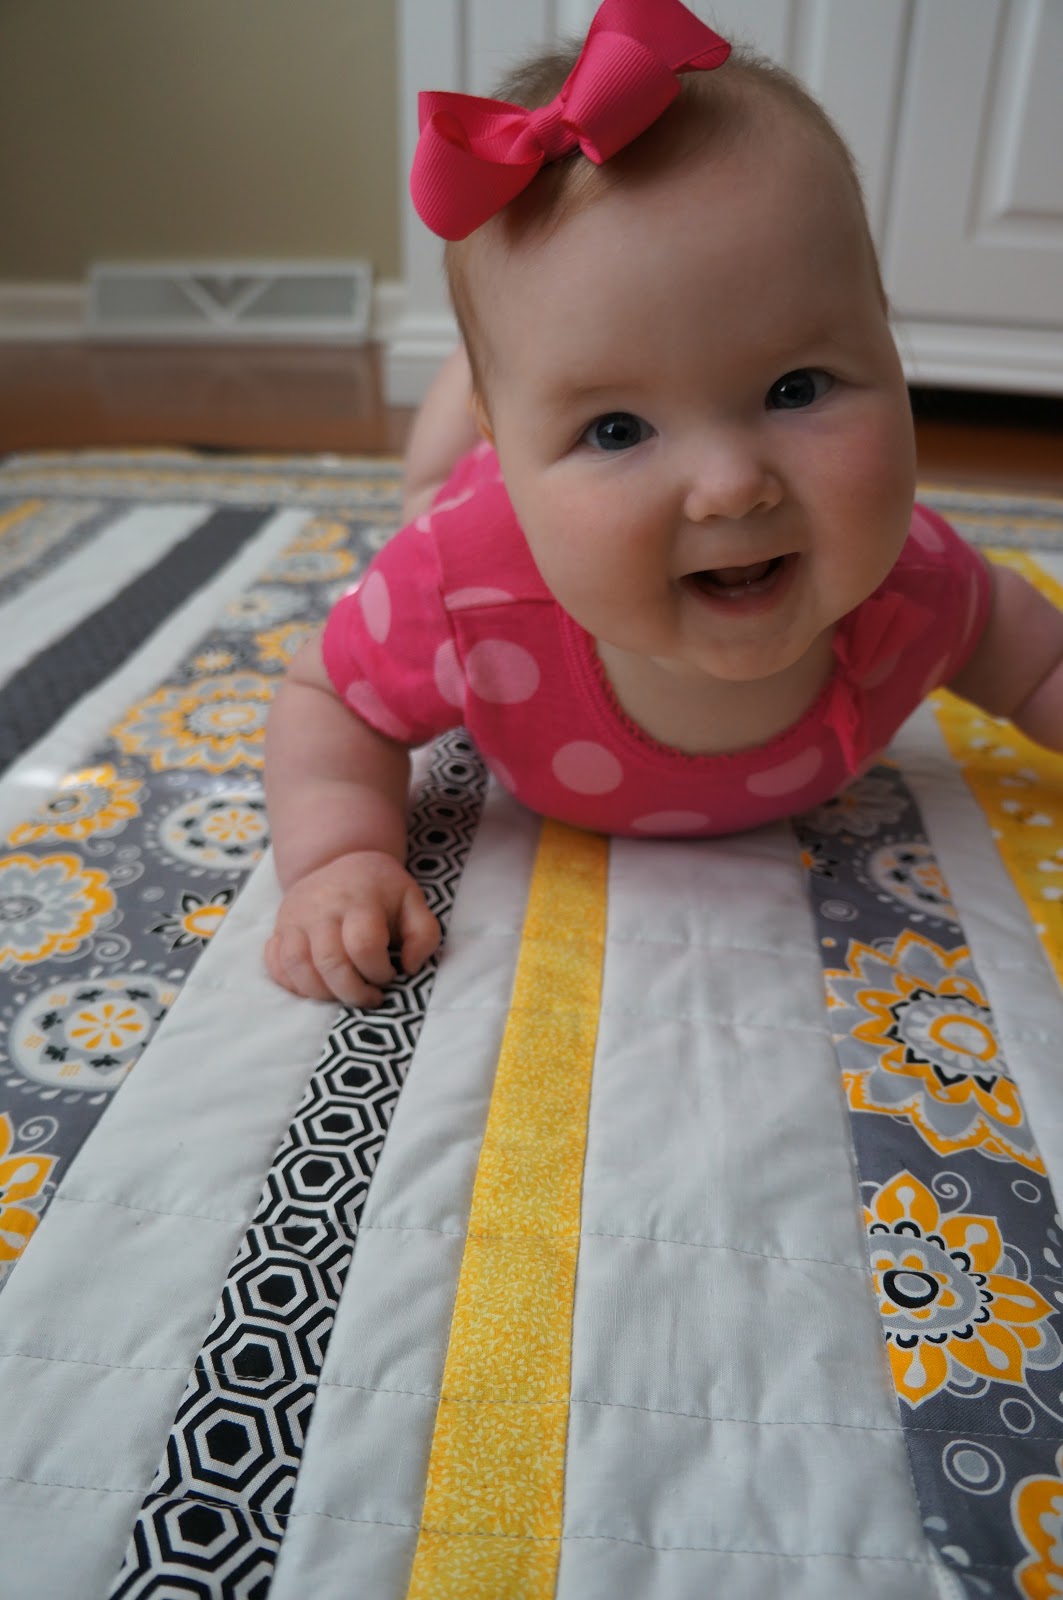
Baby Play Quilt: Finally Complete

I am so incredibly proud of my first quilt, flaws and all! Part of the joy comes from all the learning that took place through my first quilting journey. For my quilt sandwich, I initially wanted to only put a few inches extra of the batting and backing, but followed the advice I found online and "wasted my materials" so I could get 6 inches all around. In the end I was glad that I did! I don't know if this is unique to domestic sewing machines and not a problem for quilting machines, but my sandwich pulled like crazy. I started with a straight stitch down the center of the quilt. My original plan was to only quilt parallel lines, so I disregarded the advice to sew a perpendicular line down the middle as well. Terrible choice. Those two lines are a beautiful way to keep your sandwich from pulling (despite pinning). In the end, I did stitch perpendicular lines because I found I liked the "quilted" look better. All that extra fabric I started with came in handy as my quilt top didn't look very centered by the end.

Before binding, I attached strips of elastic to each corner of the blanket. I didn't want the blanket to move around once I put it on top of the rubber mat and these elastic strips were perfect!

The binding should have been the easiest part. I cut five 43" long by 3" wide strips and ironed them in half. Then I sewed them together, but it took a few attempts and my handy seam ripper to get everything going in the right direction. Once those were all attached, I started midway down a side and left a 10" tail of my binding (to use at the end for joining the two strips together). My next hiccup were beautiful mitered corners...It was so hard for me to NOT sew the 1" section that my brain sewed it anyway...for all 4 corners. Then when I tried to turn my binding, I realized my error, but it didn't click that it was from stitching all the way through the corner. Instead I simply ripped the seams at each corner and folded them the other direction with full stitching. The third time I got it right.... thanks to Jenny! (In the photo on the right, I used chalk to remind myself to STOP!)
 
For my next quilt, I want to REMIND MYSELF of the following:
 - Baste pin like crazy over the ENTIRE PIECE. Yes, Lauren, things will shift, but trust me, keep those pins in there!
 - Start by stitching through the middle of the sandwich to make two perpendicular lines to anchor the sandwich.
 - When sewing bias strips, lay them RIGHT SIDE to RIGHT SIDE perpendicularly and stitch from top to bottom (not bottom to top) on the diagonal.
 - STOP sewing 1" from the corner, fold the binding, then start sewing again at the corner.

Wednesday, August 29, 2012

Infinity Scarf

Have you been searching for a way to upcycle your favorite T's that are stretched out, pilled, but you love too much to part with? Thank goodness for those who have a solution to everything on the internet!

I love my yellow tshirt. My sister said it had to go, "....yada,yada, pilling, yada, yada, prego shirt, yada..."

So I made it go to a better home...around my neck! It's as easy as Cut, Stretch, Wrap!


Monday, August 27, 2012

Evolution of a Pressboard Bookshelf

Here's another project I've been working on in Sophia's room. Her bedroom will likely be the best room of the house at this rate! I LOVE BOOKS (not as much as I love saving money, but pretty close). I have a few hundred stashed around the house. Have I read them all? No. Do I plan to? No. Do I love the way they make my house feel like a home? Absolutely.

Here's a before and current shot of the pressboard shelf I've had since I was in high school. I know, I should probably just chuck it, but there's still life in it. Plus, I don't really want to invest in a nice piece of furniture that is going to be LOVED ON BY A CHILD and covered with dents, dings, and broken pieces. I am firm believer that kids should be kids, which means that they must have SOME furniture in their room that is functional and disposable. (The antique rocker that belonged to my grandmother is to be treated with the utmost respect....but I know that at least one more dent will be added to it each year.)
                             
I also am a firm believer that children should have the freedom to live in organized chaos. After teaching for 4 years, I learned that no matter how I put the books on the shelves at the beginning of the day, they would look completely different within 8 hours. Keeping that in mind, I wanted to give Sophia the opportunity to store her books (facing any direction she pleased) in bins (so that I wouldn't lose my senses over books facing the wrong direction). I purchased the bins at Walmart for about $5 each. Then I used stencils from teaching to trace numbers onto Heat N Bond paper, which was then ironed onto fabric remnants from her bird mobile over the crib. In the near future, I'd like to line the back of the shelves with a darker fabric and possibly attach some moulding to the front! (I'd also like to put some pictures in my frames and attach little cloth flowers to her branches in the vase on the shelf, but that will have to wait.)

Dot Mobile

While I was pregnant, I found so many great nursery ideas on Pinterest. I fell in love with two mobiles - the bird and the dot. I knew the bird would be larger so that was slated to hang above the crib, but where to put the dot?

The answer to that question came when I decided on the size of my dots. I LOVE SAVING MONEY, so any cheap or FREE solution would be perfect. I decided to use circles cut with a 1" punch (I had previously purchased) from paint color cards (FREE). I took my striped crib fabric to walmart and got busy searching for color matches. Within a few minutes I had 4 cards of each color.

I punched as many dots as I could from each card and then stacked them back to back (since the reverse side of each color card was white). Then I laid the dots out in patterns to be sewn together with off-white thread. I must confess that I was actually working on this project the night before Sophia joined our family and that the project was finally finished (and hung) when she was a month old.

Stitching the dots together was a bit tricky because I didn't glue the pieces together. (I skipped the adhesive because it gunks up the needle and my trusty machine.) I stitched a few extra strands knowing that I'd mess up on at least one or two.

I tied the ends of each strand to a tiny wreath I found at the Dollar Store and suspended the mobile with fishing line. Sophia loves to watch the dots spin while I change her!

Total Time Spent - 3 hours
Total Cost - $1

Little Taggie

Picked up some fabric in the remnants bin at Hobby Lobby a few weeks ago. Loved the hot pink minky, but only had a quarter yard. I found a full yard of the striped fabric and was hoping I could come up with something fun for Miss S.

After reading through several DIY blogs for Taggie blankets, I found this one that seemed to be the best. I find a good DIY post includes enough pictures that reading the instructions is simply only necessary if I run into a snag! Thankfully, Larissa at Just Another Day in Paradise has done all the hard work!

I quickly took my striped fabric into my gift wrapping room (aka, the lonely laundry room) and found some ribbons that would work beautifully! I cut each of mine 3" long. (I think 3" is better when you have to baste and then stitch the fabrics together, plus Miss S really loves her long tags!) I also ironed them in half. Most bloggers didn't touch on this invaluable step!

I cut 13" squares from my remnants and basted the ribbons onto the stripped fabric with 1/4" seam. Then I stitched the minky and striped fabrics together (right sides facing each other) with a 1/2" seam. Make sure to leave a 2" openning for easy turning. I like to back stitch where I start and stop with the machine to ensure I don't pull any stitches when turning the fabrics right side out. Finally, I stitched a nice border around the edges to hold in any taggies that get loved on a bit too much!

The project took about 20 minutes to make two. The minky fabric was a bit tricky to sew with because it had more stretch than the striped, thus the importance of pinning when using stretch!

Thursday, May 17, 2012

Cape Tutorial

This weekend we will be celebrating my nephew's third birthday. He (and his two older brothers) LOVE dressing up as superheroes. Brian came up with the brilliant idea that I sew some capes for Mr. N this weekend. I found a GREAT tutorial that I slightly adapted. The cost and time requirements were relatively low. Additionally, I am making the capes reversible, which will save my sister-in-law a bit of space when storing the capes.

Project Breakdown:

Step 1: Go Shopping!
- Purchase cape fabric. I went to Hobby Lobby where they have 52" wide satin for $3/yd. I purchased 1 yd in four fabrics. This was enough to make TWO capes in each color.
- Purchase decorative fabric for the symbols. The sequins and lame were $6-7/yd. I purchased a 1/4 yd in each color, but could have gotten away with 1/8 yd. I've got plenty left over for other projects in the future.
- Purchase some iron-on adhesive. I got the Heat & Bond Lite, 1 yd for $3.50 --- this is the most expensive item, so I recommend using the 40% off coupon!
- Purchase 1/2" wide velcro. I would strongly suggest the SEW-ON, not adhesive if you plan to sew. I learned the hard way that adhesive velcro doesn't require pinning but it does gunk up your needle and messes up the tension on your machine.

Step 2: Prepare Your Capes!
- Fold your fabrics in half.
- Layer the two fabrics you plan on sewing together and pin. You will cut both fabrics at the same time - 4 layers!
- Cut bottom edge of fabric for a nice crisp line. (I used my rotary cutter!)
- From the bottom cut edge, measure up 28".
- Cut neck. (I created a pattern using some old tissue paper. I made the back of the neck 3.5" long and the hypotenuse 7" at a 30 degree angle --- again, I used the handy rotary mat with these lines premarked.)
- Cut out neck straps. I just eye-balled about 1" and started cutting. When I got close to the neck line, I started to curve my cut.
- Finish cutting the cape. Because you are cutting both fabrics at the same time, you don't have to be perfect. I simply cut as close to the selvage as I could. At the very bottom, I went back and rounded the edges of the capes for a bit of flare. (Of course, now I am thinking that a square edge would have been much easier to sew, but the round edge will just give me a bit more experience!)


Step 3: Prepare Your Symbols!
- Find your symbols/emblems online or make them yourself. I used Google images and looked for black and white images related to Star Wars and found the Rebellion symbol and X-Wing. For the shield with the letter and lightening bolt, I created the images in Publisher.
- Print images on 8.5"x11" paper and cut out.
- Trace REVERSE/WRONG SIDE UP of images onto adhesive. (They MUST BE REVERSE in order for them to appear correct on the final project!)
- Cut out traced images.

Step 4: Iron-Cut-Iron-Sew Time!
- Turn iron on to medium heat with NO STEAM. - Place bumpy side of traced adhesive FACE DOWN on the decorative fabric. (The paper side should be face up.)
- Iron over paper side of adhesive for 2-6 seconds. (There are directions printed on whatever type of adhesive you purchased.)
- Cut out your adhesive + decorative fabric.
- Peel off the paper side of adhesive and place FACE DOWN onto cape fabric.
- Iron over decorative fabric (adhesive facing down) on cape for 2-6 seconds.
- Sew around the appliques with a straight or zig zag stitch.
- Place two capes RIGHT SIDES IN on top of each other and pin.
- Straight or zig zag the two capes leaving a 2" gap somewhere.
- Turn your capes right side out. - Ladder stitch the gap closed.
- Sew on 1" pieces of velcro on the neck straps. (Of course, you could always do this step earlier to hide the stitching.)

Monday, May 7, 2012

Placemat Pillow Tutorial

I LOVE pillows! I love looking at them in magazines, in stores, and particularly in my home. Despite my crazy love affair with them, I can't stand the price tag that most pillows sport. Why in the world two pieces of 20"x20" fabric and a bag of polyfill add up to $50+ is mind boggling. So I've been investigating ways to cut costs on the things I love. Some of my favorite tricks are buying remnant fabrics. You can get two coordinating fabrics to make any size pillow! I also love the idea of purchasing a set of four napkins (conveniently cut to 20"x20"). My latest discovery are placemats. I've heard of folks buying two, stiching them together, and then stuffing, so I did just that. Kinda! I found that my clearance placemats from Target were two pieces of fabric topstitched together. I used my handy seam ripper (that came with my sewing machine) to open up a 2" section and then used up 2/3 bag of 16oz poly fill. (I like my pillows full, so I'll probably rip open an old pillow that I don't care for and use that stuffing to really plump it before top stitching the 2" gash closed.


Thursday, May 3, 2012

Infant Peasant Dress Tutorial

We took Sophia to church for the first time a few weeks ago. The weather was unseasonably cooler, and threw a kink into outfit plans! I knew she would need to wear a sweater or a jacket. Dilemma: Sophia has grown so quickly that she no longer fit into the newborn sweater, but wasn't ready for the 6 month size. I did have the PERFECT little blazer for her, but no dress to match. Solution: sew one quick. I used this pattern and tutorial. I added two inches onto the length of the peasant dress hoping it would be a bit longer on our growing bundle of joy. I tried to get a bit too crafty and added a lining (in green) as well as ribbon to the sleeves and bottom hem of the dress (not shown...because I decided at the end I didn't like them and had to rip several seams to remove them). The dress would have taken about 45 minutes had I just stuck with the pink fabric (extra broad cloth I had sitting around) and the lining.
  

The most difficult part of the pattern to sew were the arm holes. I don't know how the originator actually accomplished this using her sewing machine to straight stitch on the wrong side of the fabric. I found that the sleeves were just too tiny, so I had to actually top stitch, very slowly, and rotate the sleeve around the needle. I had a lot of fun with the pattern and could definitely see using it again. However, at this point I would need to enlarge it to fit our sweet baby who has moved on to six month clothes! The cute little flower pin follows the same creative steps found in the 5 Minute Bow post. I cut my ovals from old Christmas ribbon!

Bow Tutorial (with organza)

Each week, we endeavor to take a cute picture of our growing girl. To add to the variety I've made a few bows for her. Here's a link to the original idea. (Thanks, Pinterest!) I cut ovals out of some extra sheer fabric I had purchased years ago from Walmart. I have NO IDEA what it is, but the edges melted nicely when placed near a flame. The pieces took no time to "edge", layer, and stitch together. I even had fun going through my old button stash to find the right center for my flower. I then added a little hair clip to the back so that I can easily attach the bow to Sophia's different headbands.


Related Posts Plugin for WordPress, Blogger...