Showing posts with label Living Room. Show all posts

Tuesday, January 29, 2013

Update on the Piano Wall

Got a nice jumpstart on the piano wall and mantel. I was able to fix my sagging coffee filter wreath with some handy zip ties and a grape vine wreath from the local dollar store. I think I might lower the wreath just a bit so it's centered up in the window. I also would like to make some heart garland! We'll see if that gets done amidst the whirlwind in the dining room for Sophia's big day.

I found the printable to the right on pinterest! I also had fun making the paper hearts in the wanna-be-cloche (glass from a non-existent brass anniversary clock and a small pottery plate). Thank goodness for freebies!

Thursday, January 24, 2013

Coffee Filter Wreath

I've been working on my piano mantel and I'm so excited about the latest addition! I found this easy tutorial for a High Impact, Low Cost, Low Time wreath to hang over my painted window.

Supplies:
  • Hot Glue Gun
  • 200-pack Basic Coffee Filters
  • 36" Foam Pipe Casing 3/4" Wide (at Home Depot near the copper pipes) *UPDATE: Use a bulkier foam casing to ensure the wreath's shape. My foam has stretched and now my wreath resembles a large zero instead of a perfect O. I've also read that you can use standard foam forms, old grapevine wreaths, pool noodles, and even paper plates with the center cut out!
  • Packing/Duct Tape
Assembly:
  1. Cut foam to 36". (The foam from Home Depot will come in 6' sections for about $1.)
  2. Tape ends of foam with packing or duct tape.
  3. Fold filters. I did this rather fast and it worked just fine. I placed them inside one hand and pushed down with my fingers on the other hand to make them pointy in the center for glueing.
  4. Hot glue filters everywhere working your way around the foam. Come back and fill in any empty spots.

Thursday, December 13, 2012

Painting Navy

Window/wreath above the piano
Inspiration (thanks, Pinterest!)

My neighbor's old window has been leaning up against my garage wall for over a year now, and I think I've finally devised a CONCEPT for it. It will be called a "concept" simply because I have NO idea if this will actually work in the real world. I'm what you might call design-challenged.

I have decided to paint the old window a deep navy blue and hang it above the piano. Ideally, I'd like to use this window as the backdrop of all kinds of seasonal décor since our fireplace mantel is crowded out by our not so small TV. I chose navy simply because it goes with SO MANY other colors. However, I went the cheap route on paint. Why oh why do I do this to myself? The man at Walmart couldn't figure out how to pull up the mix list for the Ben Moore color I had originally chosen, so I grabbed a paint chip from their selection that I thought matched. Did I take it outside? Nope. Sure the colors matched under fluorescent lighting....but I don't have any flourescents in my living room. Result: Royal Blue instead of Navy. The Royal Blue is a bright, saturated, delicious color, but not what I wanted. Taking a cue from my friend Julie, I went in search of other paint cans in the garage to mix the color I desired.


First of all, it's important to note that you should never try to mix paint that's been mixed in the store. There are too many factors that will play into the final paint result, such as texture, sheen, and the fact that there might be a rainbow of added colors if you didn't mix them well enough. However, I only worry about that if I'm attempting to mix paint for walls. Small pieces aren't a big deal to me! So I mixed my Stunning Navy with Black exterior paint. If you can't tell a difference from the left image and the two on the right, you might be color blind.....or my camera did a poor job of capturing the difference. Either way, I'm much happier with the mix! Be warned though: mixed paint takes FOREVER to set up!

Monday, May 7, 2012

Placemat Pillow Tutorial

I LOVE pillows! I love looking at them in magazines, in stores, and particularly in my home. Despite my crazy love affair with them, I can't stand the price tag that most pillows sport. Why in the world two pieces of 20"x20" fabric and a bag of polyfill add up to $50+ is mind boggling. So I've been investigating ways to cut costs on the things I love. Some of my favorite tricks are buying remnant fabrics. You can get two coordinating fabrics to make any size pillow! I also love the idea of purchasing a set of four napkins (conveniently cut to 20"x20"). My latest discovery are placemats. I've heard of folks buying two, stiching them together, and then stuffing, so I did just that. Kinda! I found that my clearance placemats from Target were two pieces of fabric topstitched together. I used my handy seam ripper (that came with my sewing machine) to open up a 2" section and then used up 2/3 bag of 16oz poly fill. (I like my pillows full, so I'll probably rip open an old pillow that I don't care for and use that stuffing to really plump it before top stitching the 2" gash closed.


Friday, July 1, 2011

Furniture on the Move

A few weeks ago, we checked out the new couches on Haverty's website. I thought I found something I could love, so we drove to the store that weekend. Have you ever thought something was perfect and then after sitting on it asked yourself, "How in the world did this get past quality control!?" The lovely sofa sounded like a babie's diaper. The saleslady explained that it was the wrapping around the down feathers that made the sound. Not a good enough reason for me! She asked us what we were looking for and I told her all about my checklist. Surprisingly, she said that they had a new couch on the floor that wasn't online yet because it's a new supplier. SOFA LOVE at FIRST SIGHT! We've made our order and expect delivery by August! It's a sleeper, of course. We also ordered two chairs. I am not sold on the fabric (yet), but the saleswoman said that if we bought 3 pieces, the sofa would be 10% off (basically paying for the additional perk of the sleeper). She also told us that since the chairs were not special orders, we could simply return them within 3 days of delivery. We are looking forward to all of our new pieces! Here are some sneak peaks!
From Drop Box
From Drop Box

Thursday, March 24, 2011

Custom Sofa!

I stumbled upon Bassett's website the other day, and took a trip to the store last night. Did you know that they can literally make the sofa you want?! I was thrilled! The sofa I found at Haverty's was a bit thin/skimpy looking. It didn't feel very warm and inviting. It was something about the cushions looking too ... thin! I have an appointment to pick out all of the pieces for the custom sofa on Saturday. From there, we'll talk prices. We aren't happy about the price increase; however, the couch will be exactly what we want...3 cushions, detachable back cushions (for cleaning and fluffing!), 90" or less wide, extra large seating area (with reduced arm roll space), durable fabric, and turned legs!

French Doors


Last Friday, a friend of ours installed our French Doors between the living room and dining room. I really need to upload pics to show you how incredible they look! It's funny when Brian and I look back over the last 2 years here and realize how much our home has matured! (Bachelor furniture only lasts so long!)

Sunday, March 13, 2011

My Guest's Work of Art!

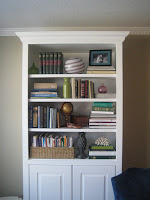
Well, all that research on bookshelves was nice, but when it came to implementation, I just didn't get it. I tried a few patterns of shapes, sizes, and colors that I found online, but I couldn't complete the design to fill the entire space. So I called my friend Sarah and asked for her help. Within an hour, she had all the shelves stocked and looking beautiful! It was like a beautiful ballet as she grabbed books (which I thought were impossible to use), and turned them backwards! She brought in so many colors and textures. I love the glass she incorporated. One thing I did learn after our adventures in decorating was that a picture cannot truly capture the look of a bookshelf. There are whimsical shadows that disappear with a camera's flash. I also learned that bookshelves look different from different angles. The pictures below make the shelves look empty, but when viewed from the couch with the lighting from the bay window or the ceiling fan, they look full and warm! Thanks again, Sarah!!!! You are my hero!!!

Sunday, February 27, 2011

Pining for a New Sofa

Every few weeks I get the urge to throw out our lovely sleeper sofa and shop for a replacement. I get tired of the color....that I can never match. Overall the couch is great. It's almost 9 years old and it still has a decent overall shape. The fabric has held up pretty well too. Sometimes I try to tell myself that it's just me that hates the fabric and that I have a GREAT couch. Yesterday, to prove this theory to myself, I took a cushion to Tony's Fabric. I asked the ladies what could go with it and they said, "Anything!" I'm pretty sure they said it twice. However, as we made our way up and down each aisle, we were hit with the harsh reality that nothing really matched it. We found one fabric that had these great geometric patterns, perfect for pillows. The background was black...yes, black...which I am deathly afraid of, but it matched. The patterns were a tea, lime, and terra cotta color. Who knew those were the colors in the unmatchable sofa? The fabric was pricey and I would have to buy 1.5 yards of it just to get two shapes, the rest of the fabric would be waste. So I didn't make a purchase.

And once again, I am on the hunt for a new, more neutral couch. I think I've found a style with good reviews at Haverty's. I don't like the legs at all, but the dimensions are perfect. The price on the chairs is a bit high, but again, the size is just right. We'll see what happens!

Sunday, November 21, 2010

First Floor Updates

We've been dying to replace our stained and tired first floor carpeting since the day we put a contract on the house. We were able to get new carpet for the stairs and second floor, but had aspirations of something more beautiful downstairs. (You'll also notice the bright red walls, off-white trim, and crazy brass fireplace cover that was never attached...those have been updated as well.) We found our African Mahogany 12 mil laminate with padding at Lumber Liquidators. We had a great time installing the gigantic puzzel. I'll admit that I was a bit frustrated with the speed of the project. It took more time than we bargained for to remove the old carpet and pad, replace molded subfloor by the fireplace, demolish the oak hardwood flooring in the foyer (that was so easily damaged, we determined never to get real hardwoods in a foyer again...unless sealed with clear concrete coat, which is quite expensive), undercut all of the door jams, and then cut all of our lovely puzzel pieces to size.
We didn't have any safety goggles, so Brian used my motorcycle helmet!
The floors look amazing. So do the Relaxed Khaki walls and bright white trim that are in keeping with the rest of the house. And the new 2" faux wood blinds don't look too bad either...but you'll have to wait for a picture on those. Oh, and I just realized that you can't see the new ceiling fan either!
Related Posts Plugin for WordPress, Blogger...